
If your backyard has room for spring and summer color but your schedule only allows for practical chores, black-eyed Susan can be the reliable backbone of your planting plan. This article helps you decide whether it fits your soil, sun, and care tolerance, then walks you through where to place it, how to plant correctly, how to keep it blooming, and how to regenerate it year after year without losing bed quality.
Quick answer: Black-eyed Susan is usually the right plant when you need durable color with modest effort. Plant hardy, well-spaced perennials in full sun, avoid wet roots, and use simple seasonal routines: prompt watering while establishing, regular deadheading, and a hard winter cleanup. Get these basics right and the same bed keeps returning blooms well into late summer and often into fall in warmer spells, with very little daily intervention.
Is black-eyed susan the right perennial for your backyard goals?
Most people buy black-eyed Susan because they want a plant that “forgives” mistakes. It won’t fix every problem, but it does forgive more than many ornamentals. The core decision is not whether it grows, but whether your yard’s conditions match its strengths. If your site has variable maintenance and long hot seasons, it is often a good fit. If your site stays soggy, shaded, and compacted through summer, the plant will punish you with weak stems and poor color no matter how pretty it looks in catalog photos.
Use this quick filter before you buy anything:
- Sun: It prefers bright sun. Partial shade is possible but usually means fewer flowers and more thin growth.
- Soil: It handles average soil best. Very heavy, waterlogged soil is the biggest hidden failure point.
- Watering reality: You should have no problem watering weekly through establishment, then can stretch to less frequent watering when rooted.
- Longevity expectation: It is a recurrent perennial in proper conditions, not a forever-forget-it plant. It still needs two focused maintenance windows a year.
That filter is what turns this from a “hope this gets going” plant into a workhorse. The decision becomes: can your yard give it drainage and sun, and can you spend the minimum required care time at the right moments?
How to choose the right black-eyed Susan setup for your space
Your second decision is not “which color,” it is “where and how it will be managed.” A tiny patio pot needs a different spacing and feeding pattern than a one-third acre border. The same species can serve three common setups. Pick your system first, then pick plants and layout from that.
Naturalized backyard beds
This is the best low-effort option. Use wider spacing and allow plants room to wander over time. Naturalized beds can handle occasional gaps and self-seeded renewal. If your yard has a wild edge, this is where black-eyed Susan looks strongest. Plan for 12–18 inches between clumps, depending on cultivar vigor and whether you want a dense carpet or airy movement.
Borders and pathways
Use tighter spacing and stronger structure control. Put black-eyed Susan where it becomes a repeatable rhythm marker between shrubs, around planters, or near transitions. In a border, you control height and timing with regular deadheading and occasional side pruning, so it stays neat and does not crowd the whole strip.
Containers and raised beds
Container culture is useful for renters, shade-transition zones, or spaces that get too dry for in-ground plantings. Keep containers well-drained and use a lightweight mix with good structure. Water more often because container media dries faster; most failures here come from “I watered once and assumed it will be fine all week.” It usually isn’t.

When to plant for dependable bloom: timing and hard decisions
If you get caught thinking too many seasonal windows are options, choose one strategy and execute it. Too many timing experiments in a small yard usually produce a half-full bed and wasted seed. Here is the practical rule: plant once per area, then support it correctly.
For most growers, late spring after danger of hard frost gives a straightforward path. Soil is warm enough, roots establish quickly, and first blooms come with fewer stress events than ultra-early plantings. If your region has short summers, late summer or early fall transplanting can also work, but then your goal shifts from long first-year bloom to healthy root establishment.
For best outcomes in containers, plant 1–2 weeks earlier than in-ground beds so the root system fills media before peak heat. For in-ground, wait until you can still irrigate consistently through the first two to three weeks. The plant’s “set-up phase” is where most replanting decisions are made; skip care here and it loses season momentum.
Before you start: Confirm full sunlight within 6+ hours, check drainage with a simple water test, choose wide enough spacing for your layout, and commit to a watering schedule for the first month after transplanting.
How to plant black-eyed susan so it does not fail in year one
This is the most common place where backyard plans go sideways. Planting method is what separates a thin, stretched patch from a mature bed that keeps giving you clean stems and steady bloom. Treat it like a sequence rather than a single step.
Step 1: Prepare the bed, not the plant
Loosen soil where the roots will sit and break compacted chunks. You are not building a flower bed for a greenhouse crop—you are creating oxygen and room. If soil drains slowly, create shallow contour channels or use raised beds. Avoid adding too much rich fertilizer early; overly lush top growth without root depth is fragile and disease-prone.
Step 2: Place and set depth correctly
Set plants so the crown sits at ground level, not buried deep. A buried crown rots in cool wet events and delays growth. Space by height habit: denser spacing for short compact forms, wider for taller and rank-growing forms. Mark each planting spot so your later pruning and maintenance passes can be cleanly done in straight lines.
Step 3: Water to settle, then stop over-watering
Water deeply when planting to settle soil around roots. The first two weeks are non-negotiable: keep evenly moist until roots colonize. After that, avoid turning the bed into a swamp. A dry-first then even-second profile is healthier than shallow daily moisture. If your yard is hot and exposed, water deeply less frequently rather than frequently at the surface.
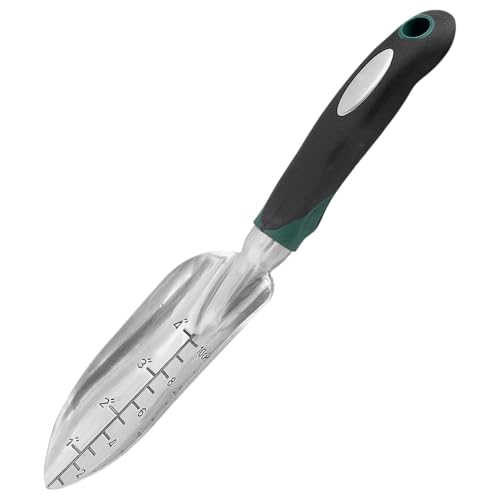
Use a tool that fits your scale. A long-handled soil scoop or hand trowel with a narrow blade makes side filling and light mulching much cleaner than trying to force root zones with fingers.
- Mulch: Add a thin mulch band around plants, not on crowns.
- Weed control: Thin the first small weeds before they steal first-season nutrients.
- Support: In wind-prone areas, a temporary stake is sometimes cheaper than replacing damaged plants.

How to stretch the blooming window with simple maintenance
Long-blooming claims are true only if you remove the right material at the right time. The plant does not need constant trimming, but it does need two things: airflow and periodic reset. If stems crowd, airflow drops and flower quality suffers. If spent stems stay too long, energy goes into old tissue, not new bud formation.
Keep the growth breathable
In early summer, deadhead first-flush flowers. That sounds simple, but timing matters: trim on a regular rhythm, not as a once-a-month “cleanup day.” Every 2–3 weeks during peak bloom, remove seedheads that are finished. This is the cheapest way to turn a tired bed into a productive one for the rest of the season.
Winter cleanup and spring restart
Wait too long on hard winter cutting and you lose a clean second season. In late winter or very early spring, trim back to healthy growth points, usually around 6 inches depending on your climate and local growth pattern. That encourages cleaner, stronger stems instead of weak tangled crowns trying to regrow from old tissue.
Water and soil stress rules that actually matter
Do not treat stress as random. Most black-eyed Susan decline cases come from one of three triggers: repeated shallow watering, dense shade with too much height competition, or neglected soil aeration. If leaves curl and leaves look dull instead of crisp, do not panic into nitrogen fixes immediately. First fix the water and air, then reevaluate.
Watch out: Watering the soil surface daily in heat creates weak top roots and a plant that collapses under wind. Better: fewer deep sessions, and less frequent disturbance of the root zone.

How to renew and multiply black-eyed Susan without losing quality
Many homeowners stop at “plant and prune.” Better results come from planned renewal. Renewal can be done three ways. Use the least expensive path that matches your time budget.
Self-seeding: free replacements with controlled intent
p>If you allow flowers to go to seed in selected patches, next spring you may get volunteer plants in useful spots. That is an easy way to fill thin edges. The downside is unpredictability, so keep it contained with a boundary line of mulch or a shallow edge and pull out unwanted seedlings early.Division: fastest recovery after gap filling
Division works when plants become root-dense clumps. Do it early in cool periods or just before stable dormancy windows. Pull clumps apart gently, keep root balls intact, and replant immediately. Root-shock is lower if you plant during stable soil moisture days and shade temporarily for 24–48 hours.
Seed propagation: best when you have open windows
Direct seeding is good for naturalized zones but less ideal if exact spacing matters. Start seed in small patches where competition is low, then thin for uniformity. This method gives you flexibility, especially if your original planting space was full of weak gaps from weather stress.
Which companion plants make black-eyed Susan better, not messy
Use companions for function, not decoration-first visuals. The goal is a stable design that stays attractive and lowers maintenance. Pair black-eyed Susan with plants that fill the same light window but occupy different root or canopy strategies.
- Pollinator-support pairings: Combine with milkweed or coneflower for seasonal continuity and visible ecosystem payoff.
- Volume control: Use low sedges, grasses, and compact herbs along the front edge to hide bare soil and reduce visual gaps.
- Heat-buffer zones: Place a few drought-tolerant annuals nearby where black-eyed Susan needs temporary visual continuity in early establishment periods.
Avoid planting directly with species that demand wet feet if your bed is already drainage-challenged. Also avoid mixing with very tall, heavy competitors that steal light and force expensive thinning. The best companion strategy is simple: shared routine and shared stress tolerance.

FAQ
Can black-eyed Susan survive through summer heat in partial shade?
It can, but flower size and number usually drop if daylight is consistently blocked. If your site never reaches full sun, choose a shade-adapted layout and trim aggressively once stems compete for light.
Do I need to divide every year?
No. Divide only when clumps become congested or decline in vigor. Most beds only need occasional renewal every few years, which makes the plant very attractive for low-maintenance planning.
How do I avoid black-eyed Susan becoming invasive in my garden?
Control self-seeding and keep it in a defined edge. Spot-cull seedlings outside your intended zone in early spring and remove old stalks before seeds fully mature. This keeps spread predictable without losing the species’ benefits.
| Backyard use case | Best placement choice | First-year priority | What to skip |
|---|---|---|---|
| Shaded pathway edge | Use smaller perennial forms in mixed border | Light pruning and wider spacing | Overwatering through heat spikes |
| Open lawn accent | Naturalized clump groupings | Drainage test and mulch ringing | Dense planting without airflow |
| Container terrace | Shallow, raised container with stable soil mix | Regular deep watering cycle | Neglecting heat dry-down |
| Pollinator patch | Companion mix with coneflower/grasses | Continuous deadheading rhythm | Ignoring seedhead control |
Bottom line: Choose black-eyed Susan when you can give it sun, drainage, and rhythmed attention for the first month, then it repays you with long blooms, easy management, and stable spring-to-fall structure. Use the right spacing, prune on schedule, and control seeding points, and this perennial becomes a dependable backyard core instead of another seasonal project that fades by midsummer.